December 07, 2015
Mani Monday: Mountain Calling Reverse Stamping
When it comes to nail art, there are many different techniques and skill levels. One easy to spruce up your mani is by stamping. You can even take it up a notch with reverse stamping. Continue reading to learn about this technique.
While reverse stamping itself is quite easy, the tricky part is the application afterward.
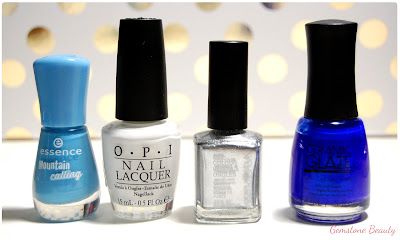
As with all manis, you start with clean nails and a base of your choice. You then apply a coat or two of your base colour. I chose Today is Fun Day, which is a gorgeous pale blue that's part of the Mountain Calling collection by essence.
At this point, you can continue working carefully as your nails are still drying, or completely wait until you proceed to the next step. You know yourself best and if you'll smudge your nails if you continue working or not.
Pick an image from a stamping plate (I chose a patterned chevron print from my MoYou London Fashionista 04 plate). Apply your stamping colour, scrape off the excess and transfer the image on your stamper. Once it's on your stamper, wait maybe 20 seconds to make sure that it's dry and apply a clear coat all over the pattern while it's still on your stamper.
Once that's dry, take a small brush (or in my case, my dotting tools) and paint the areas you want with polish. If you're working with a pattern that is heavily covered by your stamping colour, you don't have to be too precise. If you go over the stamping colour, you wont see it! But something like these chevrons require a little more precision. If you go over the line, it'll show into the next "blank" space. So you can go on the line, but not over it.
If you decided to do this while your nails were still drying, your nails are probably pretty dry by the time the polish on the stamper is dry as well. If not, wait until your nails are dry.
Using tweezers, gently remove the image from your stamper. It should come off in one sheet.
At this point, you can trim it a little before applying it to your nail (messy part down so you see the pretty part on top) or apply to your nail then trim. Personally, trim it the best you can before (unless you know the exact shape you need, keep it a little bigger and trim afterwards)
Once it's on your nail, carefully flatten down so it's all even. You can use an orange stick or a cuticle pusher. After it's all flattened out and perfectly trimmed, apply your favourite top-coat to all your nails, making sure to seal the tips as well.
Voila! All done!
Subscribe to:
Post Comments (Atom)


I love reverse stamping!
ReplyDeleteI love the design and colours you chose, it turned out beautifully!